Introduction to Printing Labels from Excel

Printing labels directly from Excel can be a huge time saver for businesses and individuals who need to create and print large quantities of labels. Whether you’re managing a mail merge, creating product labels, or organizing files, Excel provides a convenient way to design and print your labels. In this article, we’ll explore the steps and best practices for printing labels directly from Excel, including how to set up your spreadsheet, choose the right label template, and troubleshoot common issues.
Setting Up Your Excel Spreadsheet

Before you can print labels from Excel, you need to set up your spreadsheet with the correct data and formatting. Here are some tips to get you started: * Use a separate column for each field: If you’re printing address labels, for example, use one column for the name, one for the street address, one for the city, and so on. * Use a consistent format: Make sure your data is formatted consistently throughout the spreadsheet. For example, use the same date format and currency symbol throughout. * Remove any unnecessary data: Only include the data that you need to print on your labels. This will help you avoid clutter and make it easier to format your labels.
Choosing the Right Label Template

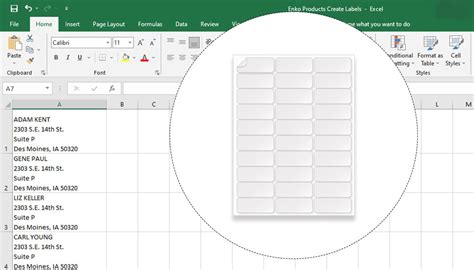
Excel provides a range of built-in label templates that you can use to print your labels. To access these templates, follow these steps: * Go to the Mailings tab: In the ribbon, click on the Mailings tab. * Click on Labels: In the Create group, click on the Labels button. * Select a label template: In the Label Options dialog box, select a label template that matches the size and type of labels you’re using. Some popular label templates include: * Avery 5160: A standard address label template with 30 labels per sheet. * Avery 5260: A larger address label template with 20 labels per sheet. * Avery 8160: A shipping label template with 20 labels per sheet.
Formatting Your Labels

Once you’ve selected a label template, you can format your labels to fit your needs. Here are some tips: * Use the Label Options dialog box: In the Label Options dialog box, you can adjust the font, font size, and other formatting options for your labels. * Use merged cells: If you need to print a large amount of text on a single label, you can merge cells to create a larger text area. * Use borders and shading: You can add borders and shading to your labels to make them more visually appealing.
Printing Your Labels

Once you’ve formatted your labels, you’re ready to print. Here are the steps: * Go to the File tab: In the ribbon, click on the File tab. * Click on Print: In the left-hand menu, click on Print. * Select your printer: In the Print dialog box, select the printer that you want to use to print your labels. * Select the label template: In the Print dialog box, select the label template that you chose earlier. Some common issues that you may encounter when printing labels from Excel include: * Misaligned labels: If your labels are not printing in the correct position, check that your label template is set up correctly and that your printer is aligned properly. * Missing data: If some of your data is not printing, check that you have included all the necessary columns in your spreadsheet and that your label template is set up to include all the necessary fields.
📝 Note: Make sure to test your labels on a small batch before printing a large quantity to ensure that they are printing correctly.
Troubleshooting Common Issues

Here are some common issues that you may encounter when printing labels from Excel, along with some troubleshooting tips: * Labels are not printing in the correct position: Check that your label template is set up correctly and that your printer is aligned properly. * Some data is missing: Check that you have included all the necessary columns in your spreadsheet and that your label template is set up to include all the necessary fields. * Labels are not printing at all: Check that your printer is turned on and that you have selected the correct printer in the Print dialog box.
| Label Template | Label Size | Labels per Sheet |
|---|---|---|
| Avery 5160 | 1 x 2.5 inches | 30 |
| Avery 5260 | 1.5 x 3 inches | 20 |
| Avery 8160 | 4 x 6 inches | 20 |

To get the most out of printing labels from Excel, consider the following best practices: * Use a consistent format: Use a consistent format throughout your spreadsheet to make it easier to format your labels. * Test your labels: Test your labels on a small batch before printing a large quantity to ensure that they are printing correctly. * Use the correct label template: Use the correct label template for the size and type of labels you’re using to ensure that your labels print correctly.
In summary, printing labels directly from Excel can be a convenient and time-saving way to create and print large quantities of labels. By setting up your spreadsheet correctly, choosing the right label template, and formatting your labels, you can create professional-looking labels that meet your needs. Whether you’re managing a mail merge, creating product labels, or organizing files, Excel provides a powerful tool for printing labels. With a little practice and patience, you can become proficient in printing labels from Excel and take your labeling to the next level.
What is the best way to set up my Excel spreadsheet for printing labels?

+
The best way to set up your Excel spreadsheet for printing labels is to use a separate column for each field, use a consistent format, and remove any unnecessary data.
How do I choose the right label template in Excel?

+
To choose the right label template in Excel, go to the Mailings tab, click on Labels, and select a label template that matches the size and type of labels you’re using.
What are some common issues that I may encounter when printing labels from Excel?

+
Some common issues that you may encounter when printing labels from Excel include misaligned labels, missing data, and labels not printing at all. These issues can be resolved by checking your label template, printer alignment, and data formatting.